
The cabinet under the kitchen sink is the hardest space in the house to organize. Pipes take up the middle, bottles leak, and everything gets shoved in and forgotten. These under-sink kitchen storage ideas work around the pipes, keep cleaning supplies easy to reach, and stay organized with a small monthly habit.
1. Empty It, Clean It, and Check for Leaks First
Take everything out of the cabinet, wipe the bottom, and check the pipes and connections for drips, damp spots, or a musty smell. Fix a small leak before you organize anything — no storage system survives a wet cabinet floor. Lay a waterproof mat or a cheap plastic tray on the bottom to catch future drips and make cleaning easier. This first step takes ten minutes and saves you from organizing around a problem that will only get worse.
2. Sort Supplies Into Keep, Move, and Toss
Sort every bottle and tool into three groups: keep under the sink, move elsewhere, and toss. Keep only the cleaning products you use weekly under the sink. Move extras, bulk refills, and seasonal items to a closet or laundry shelf. Toss empty bottles, expired products, and anything you have not used in six months. This sorting step is part of the same system in our guide to organizing kitchen cabinets in 9 simple steps. Most under-sink cabinets hold half as much as people think they should — and they work twice as well when they do.
3. Use a Handled Caddy for Daily Cleaning Products
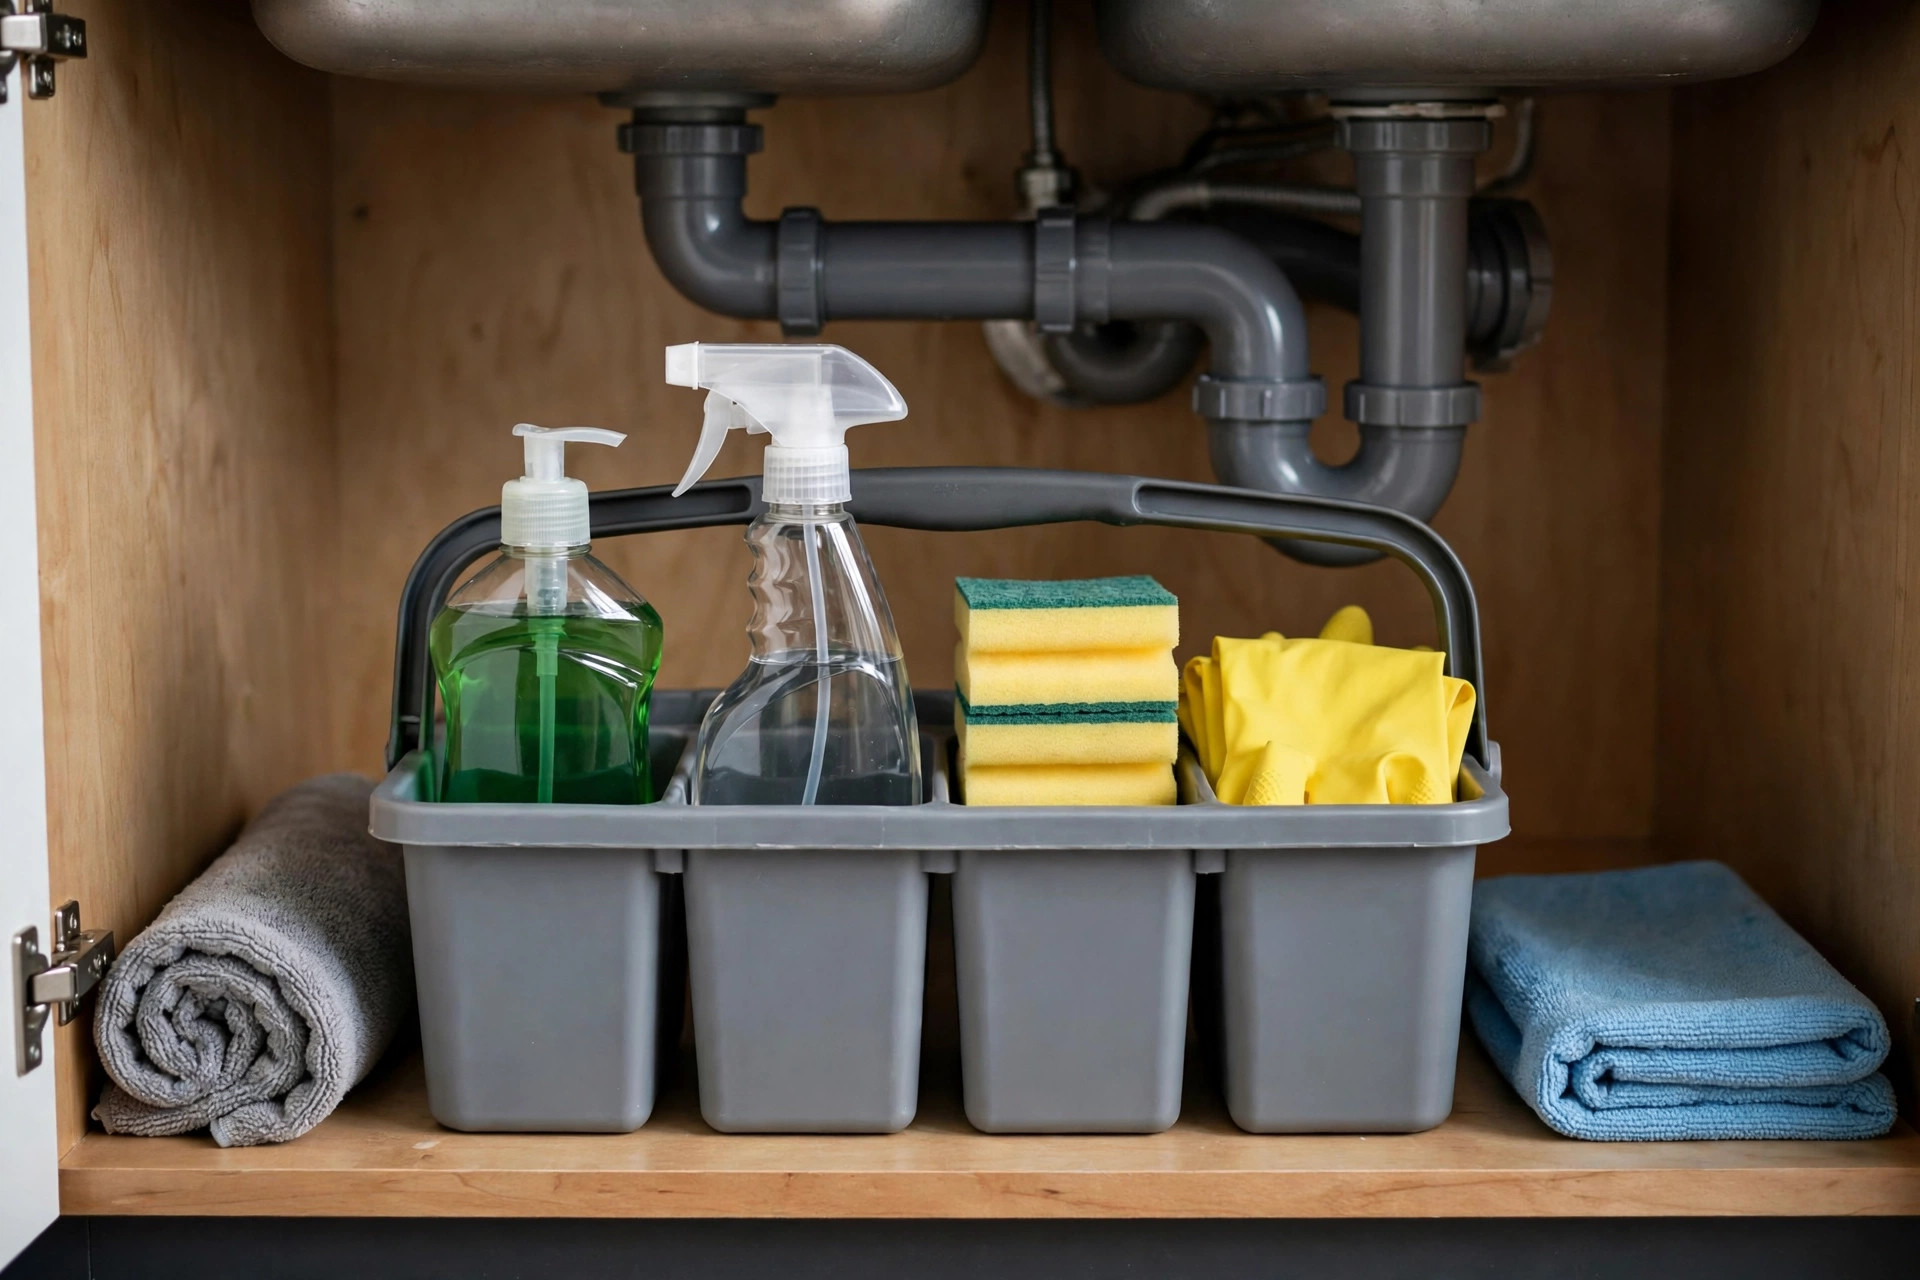
Put your daily cleaning products — dish soap, all-purpose spray, sponges, and gloves — in one handled caddy or a small turntable. You can lift the whole caddy out in one motion to reach the pipes, clean a spill, or carry supplies to another room. Keep the caddy light enough to lift with one hand, and do not add a second caddy until the first one is truly full. One caddy, one job, is the rule that keeps this cabinet usable.
4. Add a Turntable for the Back Corners
Deep under-sink cabinets hide bottles at the back. A small turntable brings everything to the front with one spin, so you stop buying duplicates of spray you already own. Choose a turntable with a raised edge and a non-slip surface, and keep tall bottles near the center so they do not tip. Measure around the pipes first — a 10-inch turntable usually fits, but a 12-inch one may not clear the drain pipe.
5. Install a Small Shelf Around the Pipes
Pipes waste vertical space, but a short, adjustable shelf or a stackable riser can create a second level above or beside them. Use the shelf for items you reach for less often, like extra sponges, trash bags, or dishwasher tablets. Keep heavy items on the cabinet floor, not on a shelf above pipes. This idea works well with the other small-kitchen storage ideas for tiny kitchens, which use the same measure-first, buy-second approach. Never drill into the cabinet to install a shelf — use freestanding or tension-style shelves that renters can remove cleanly.
6. Hang Spray Bottles on a Tension Rod
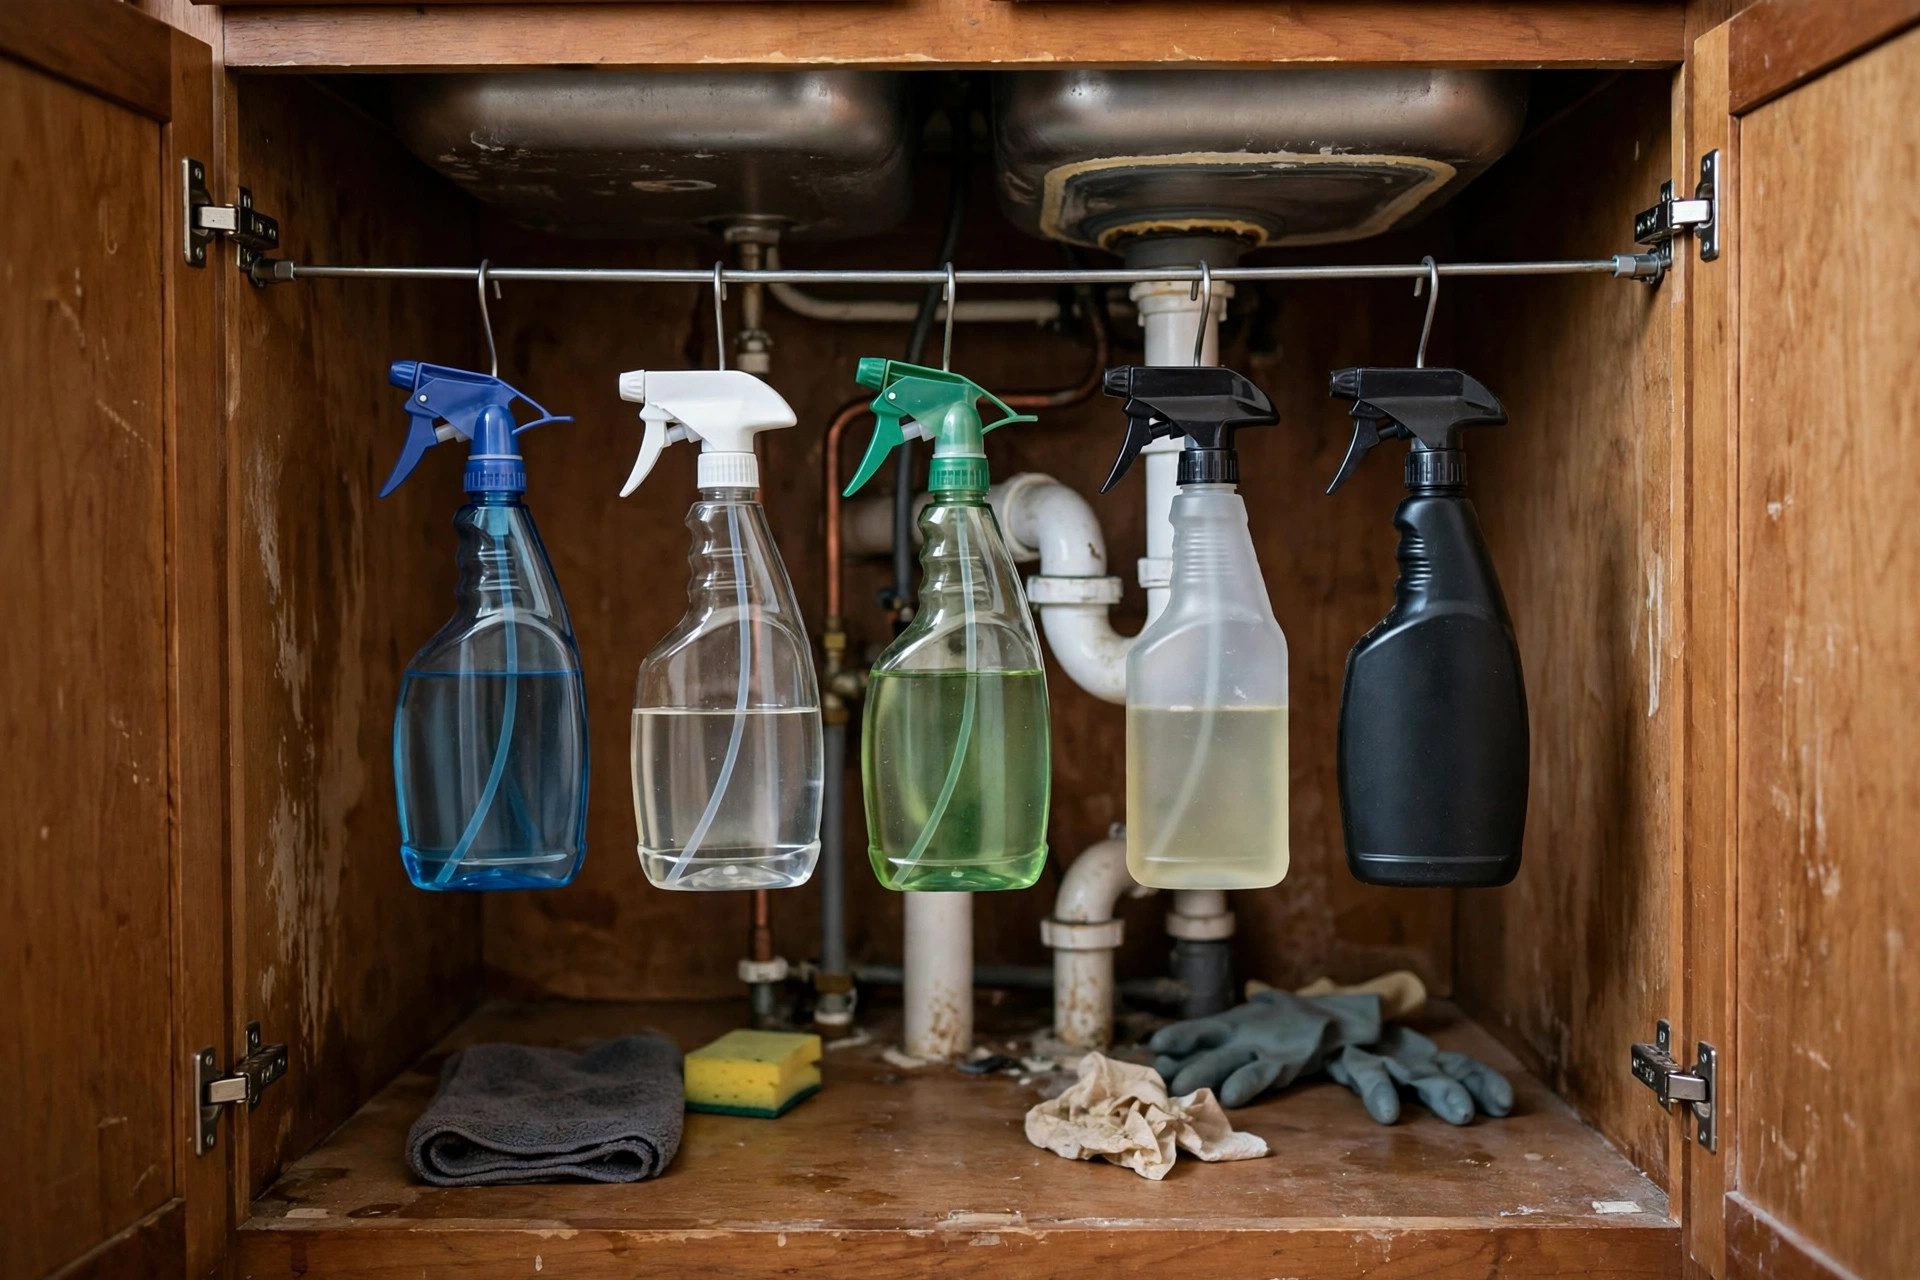
A tension rod across the inside of the cabinet creates a hanging rail for spray bottles. Hook the trigger handles over the rod, and the bottles hang neatly in a row instead of crowding the floor. This frees the bottom of the cabinet for a caddy, a turntable, or a trash bin. Measure the width carefully, choose a rod rated for the weight, and keep only lightweight spray bottles on it. Heavy bottles belong on the floor.
7. Use the Cabinet Door for Small Items
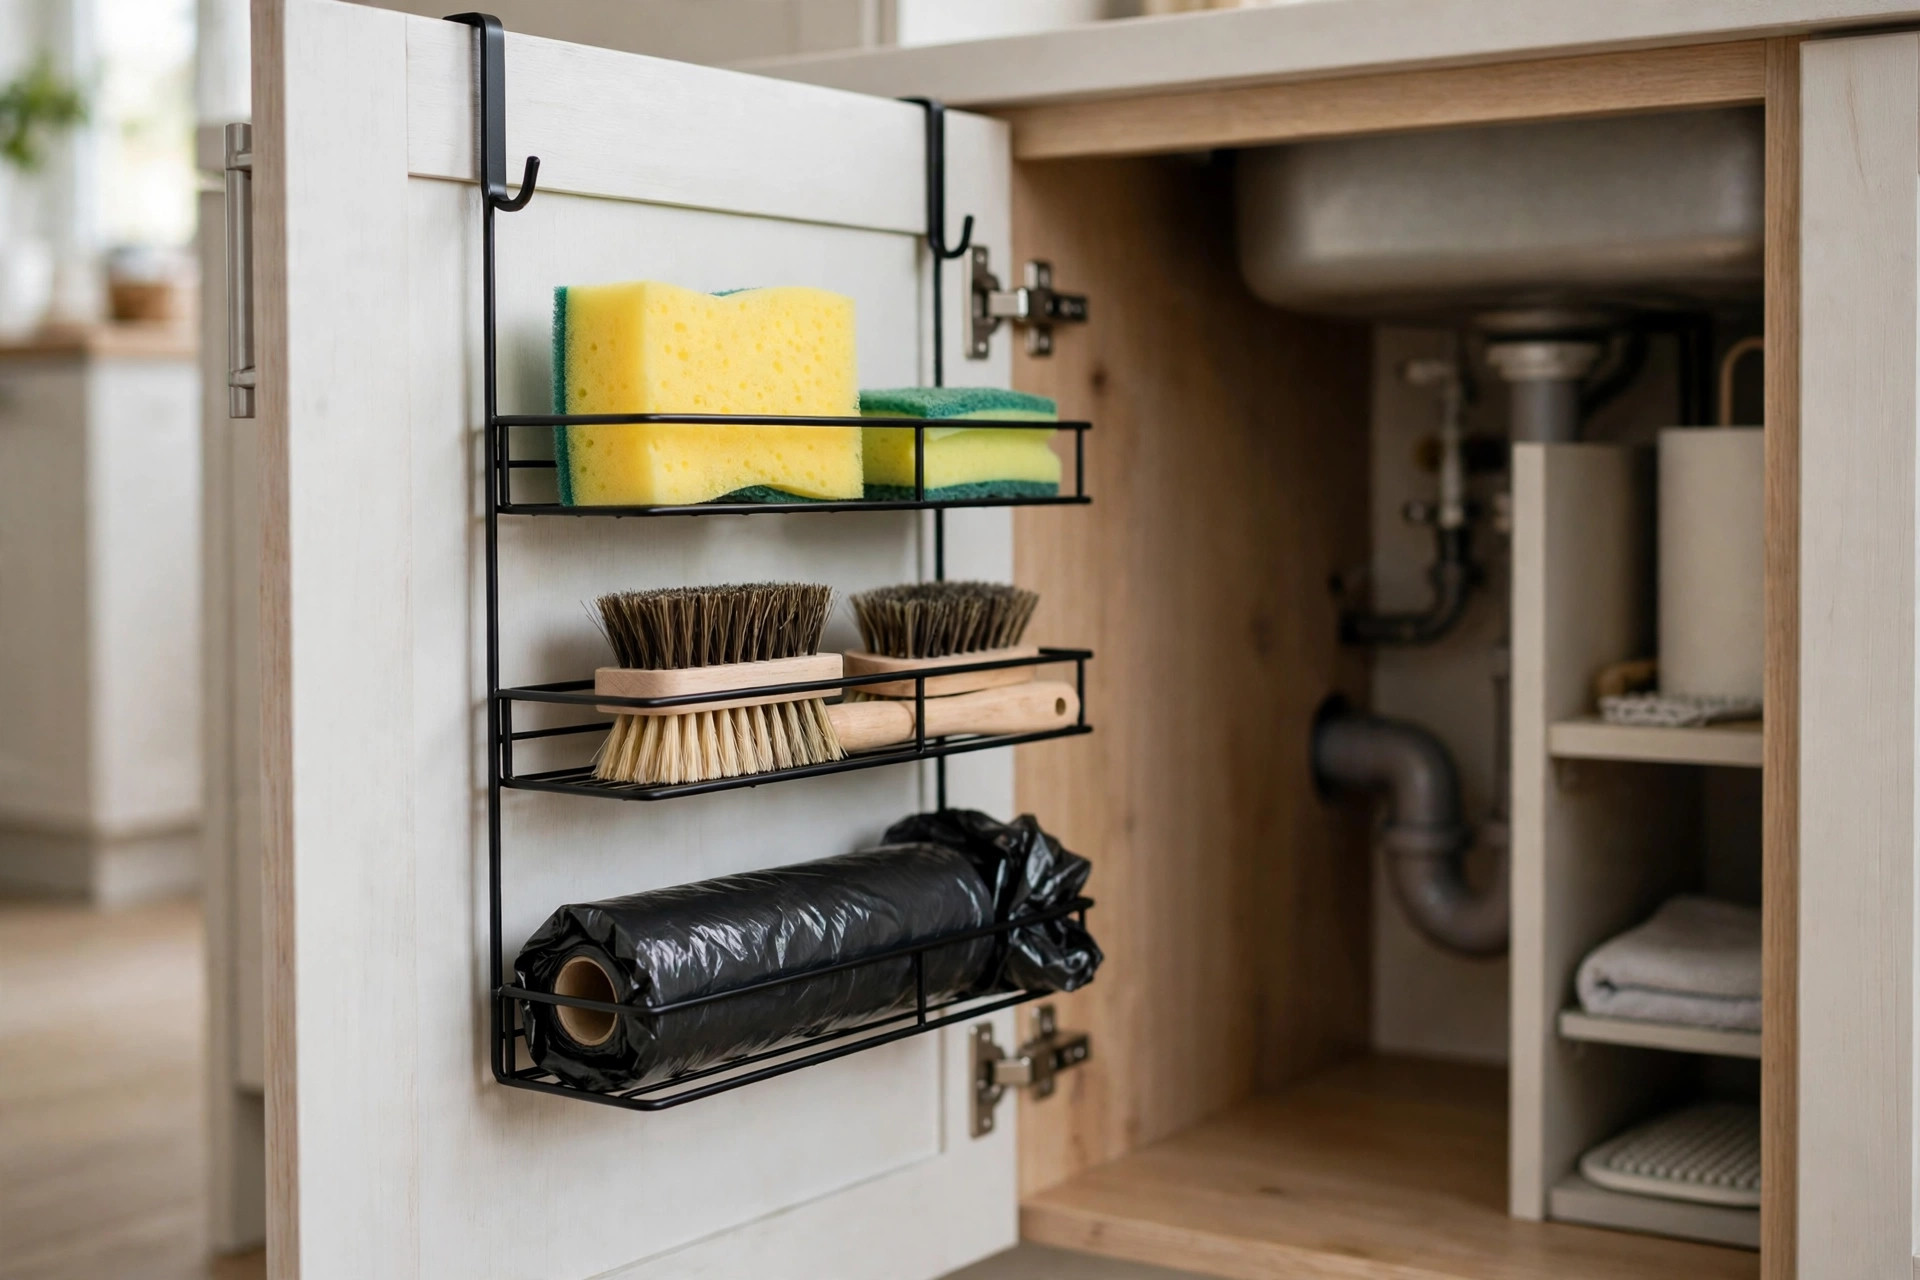
The inside of the cabinet door is free storage for sponges, gloves, scrub brushes, and trash bags. Add a slim over-door rack or a small adhesive caddy, keeping it shallow enough that the door still closes fully. Store only lightweight items on the door, and check that nothing catches on the pipes when the door swings. This is a renter-friendly fix — no screws, no holes, and it removes cleanly at move-out.
8. Keep Food and Cleaning Products Apart
Never store food, pet food, or anything you eat under the kitchen sink. Cleaning chemicals, even sealed ones, can leak or spill, and the damp, warm space under a sink is not safe for food storage. Move food to a pantry zone instead — see our pantry organization ideas for small spaces for a no-pantry setup that works. Keep a clear rule for the whole household: under the sink is for cleaning only, nothing edible, ever.
9. Store Trash Bags and Recycling in One Spot
Trash bags, recycling bags, and extra bin liners often end up scattered under the sink. Keep them in one labeled bin or a small wall-mounted holder on the cabinet door, with one roll out and the rest stored above or beside it. A simple paper towel holder mounted inside the door also works well for a roll of bags. When bags have one home, you stop finding loose rolls in three different cabinets.
10. Label Every Bin and Bottle
Labels matter most in a dark, crowded cabinet. Label bins by job — “daily cleaning,” “dishwasher,” “sponges” — and write the date you opened a product on its bottle with a marker. Anyone in the house can then find the right spray and put it back in the right place. Labels also make it obvious when a product is running low, so you can add it to the shopping list before it runs out completely.
11. Leave Space to Reach the Pipes
An organized under-sink cabinet still needs to be practical. Leave a clear path to the shut-off valves and the drain, and do not stack items so high that you cannot reach a leak quickly. Keep a small flashlight or a phone light nearby, and know where the shut-off valve is before you need it. If a plumber ever needs access, they should be able to reach the pipes in under a minute without moving a dozen bins.
12. Do a Five-Minute Monthly Check
Under-sink cabinets drift fast because bottles leak and supplies pile up. Once a month, spend five minutes: lift out the caddy, wipe the bottom, toss empty bottles, check for damp spots, and return strays to their bins. Set a phone reminder for the first of the month. Five minutes is enough to catch a small leak early, stop clutter from returning, and keep the system you built working for years.
What to Avoid
- Storing food under the sink. Cleaning chemicals and food never share a cabinet, however tidy it looks.
- Overfilling the cabinet. If the door will not close easily, something has to move to a closet or laundry shelf.
- Drilling or gluing permanent shelves. Renters should use freestanding, tension, or adhesive organizers that remove cleanly.
- Ignoring a damp smell. A musty cabinet usually means a slow leak — check the pipes before you reorganize.
- Buying organizers before measuring around the pipes. Pipes, valves, and the drain decide what fits, so measure first.
Frequently Asked Questions
How do I organize under the kitchen sink with pipes in the way?
Work around the pipes, not through them. Use a handled caddy on the floor, a small turntable for back corners, a tension rod for spray bottles, and a short shelf above or beside the pipes. Measure around every pipe and valve before you buy anything.
What should I keep under the kitchen sink?
Keep only cleaning products you use weekly, sponges, gloves, trash bags, and a small caddy. Move bulk refills, extra supplies, and seasonal items to a closet. Never store food, pet food, or anything edible under the sink.
How do I keep under-sink storage organized long term?
Use one caddy for daily products, label every bin, leave a clear path to the pipes, and do a five-minute monthly check for leaks, empty bottles, and stray items. A small monthly habit matters more than a perfect first set-up.
Conclusion
A tidy under-sink cabinet is not about fitting more in — it is about keeping only what you use, working around the pipes, and checking the space for five minutes a month. Start today: empty the cabinet, check for leaks, and put your daily products in one caddy. Save this guide for later, and share it with a friend whose under-sink cabinet needs the same one-hour rescue.